Dekkia's Blog

Is it a Computer?, Is it a PC? No, It's a Power Macintosh 4400/200
When I bought a bunch of old tech at an auction in November of 2024 I didn't expect that stuff to sit around in my Workshop for so long before actually doing anything with it.
The only things I really used so far are the IBM Thinkpad 755C I wrote a Mastodon-Thread about and the Sony Mavica I used to take photos for this blog post.
Chapter 1: show me what you got
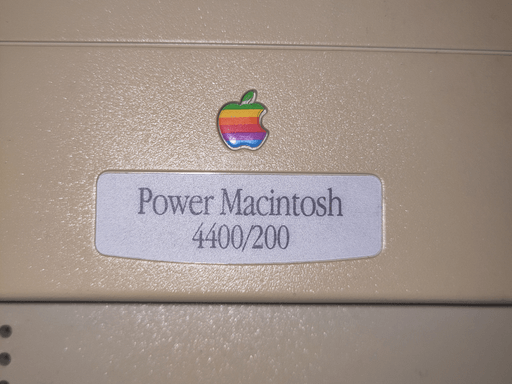
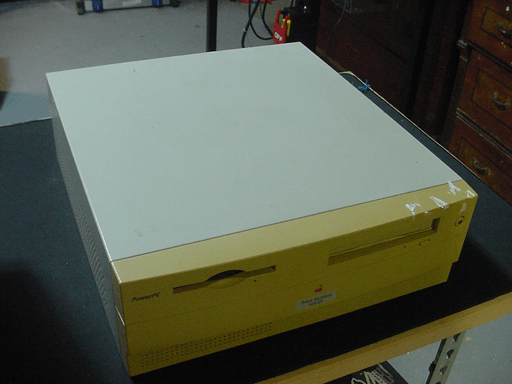
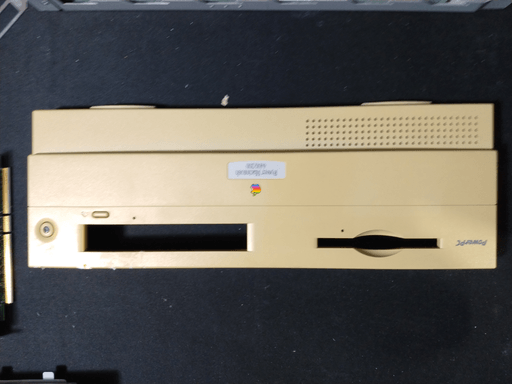
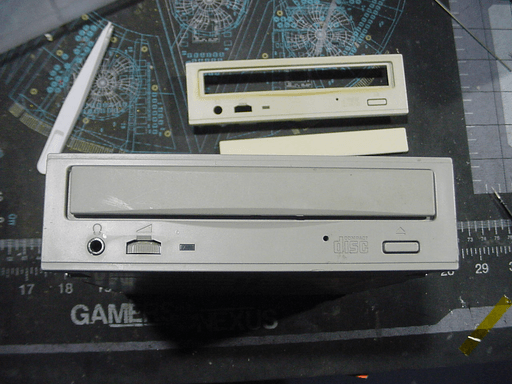
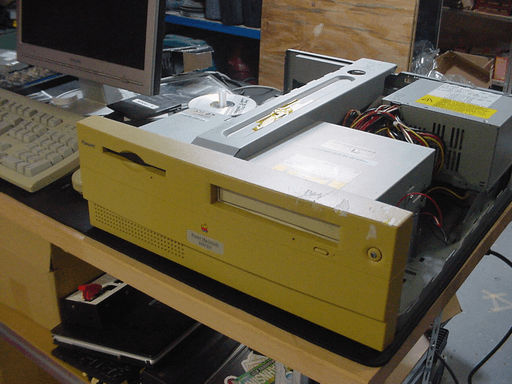
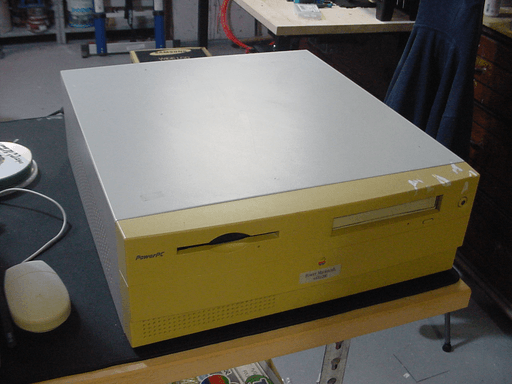
Today's patient is a Power Macintosh 4400/200. It's Computer from 1997 wit a 200MHz Motorola 603e PowerPC CPU.
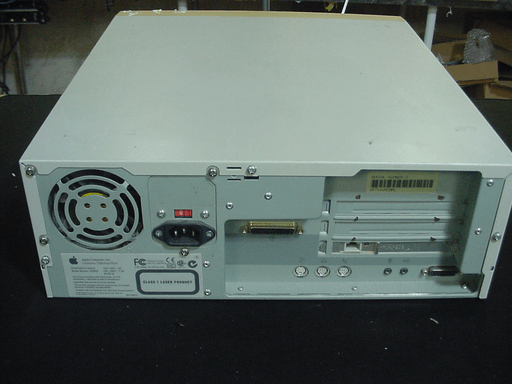
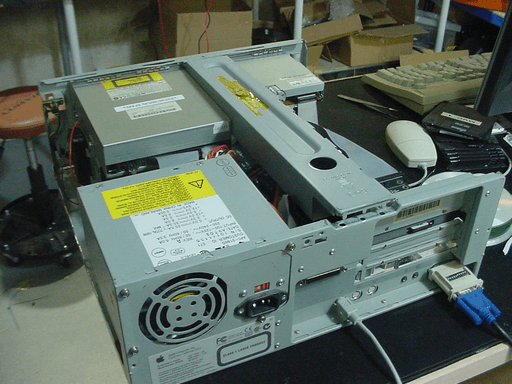
Around the back it has a DB-15 Port for Video, a single ADB Port, two 3.5mm jacks for a speaker and a microphone. To the right there's a DB-25 Port for SCSI and next to it a RJ-45 Port for ethernet on a separate card. Next to the ADB Ports are also a Printer Port and an External Modem port.
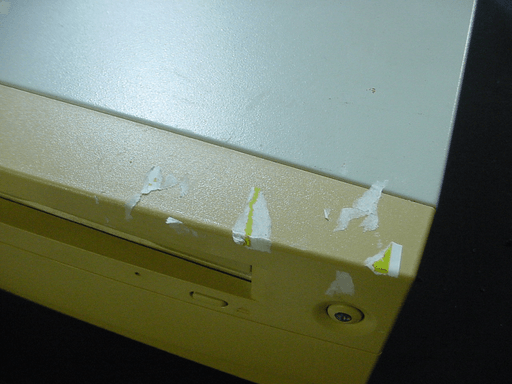
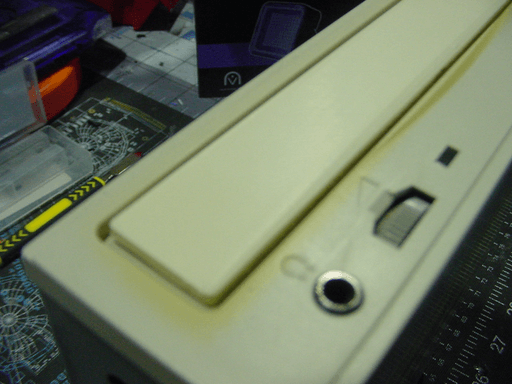
On the front is a lot of yellowing and residue from a sticker put there by the auction house. More interesting there's also a 3.5" Floppy and a CD drive with the power button right next to it. Below those there's the Power Macintosh 4400/200 badge with the old rainbow Apple logo.
Thanks to everymac.com for some of the technical specs.
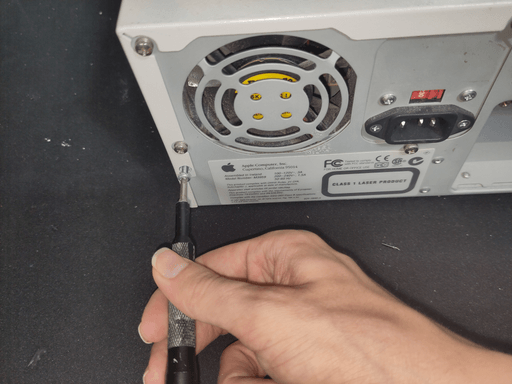
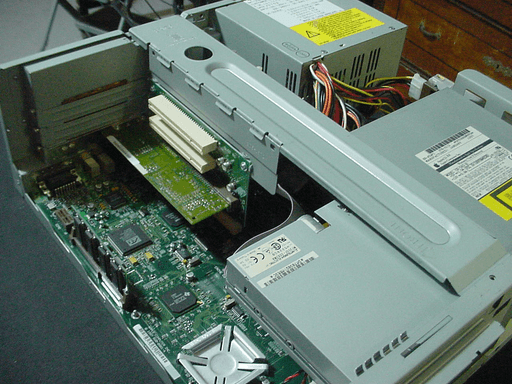
Before turning it on for the first time in probably years, I wanted to make sure everything is well on the inside, so I started to take it apart.
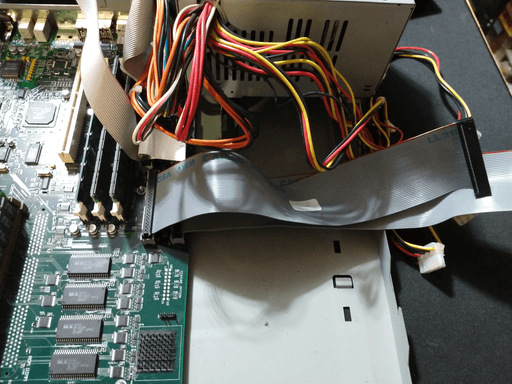
After unscrewing the three bolt that hold the top lid on, I was able to slide and lift it away from the machine. The Inside was as nice as it probably can be at that age. No leaky or bulging caps, no spilled liquids, just loads of dust. Nothing some compressed air can't fix.
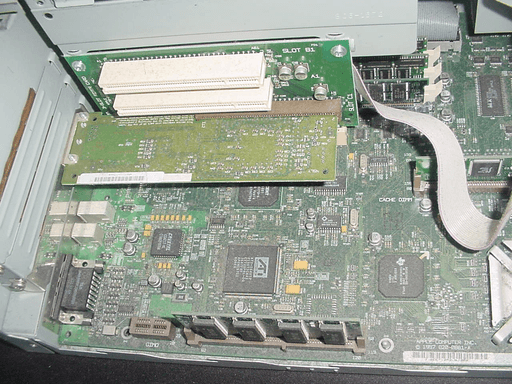
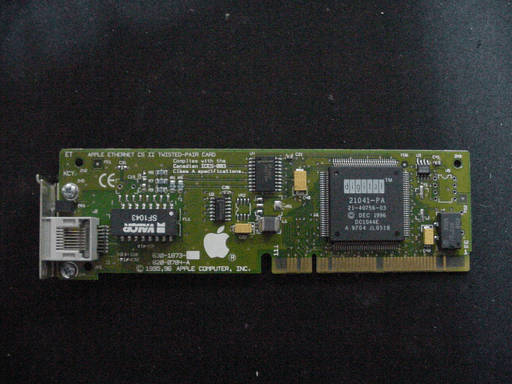
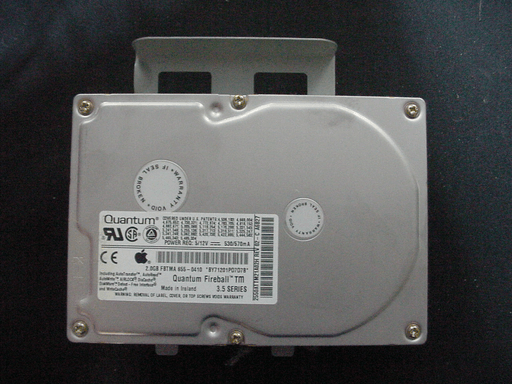
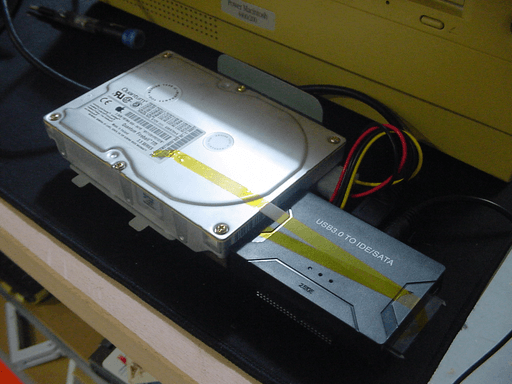
I went ahead to take out components to clean and/or test them separately. The Apple Ethernet CS II Twisted-Pair Card with its beautiful and simple name came out first together with its riser, the 2GB Quantum Fireball HDD was next. After I removed the front Panel I finagled out the mid frame that also holds the CD and Floppy drives.
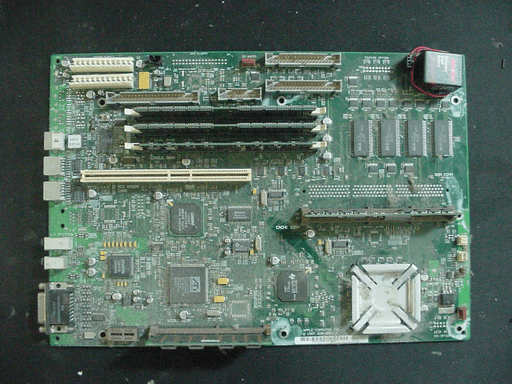
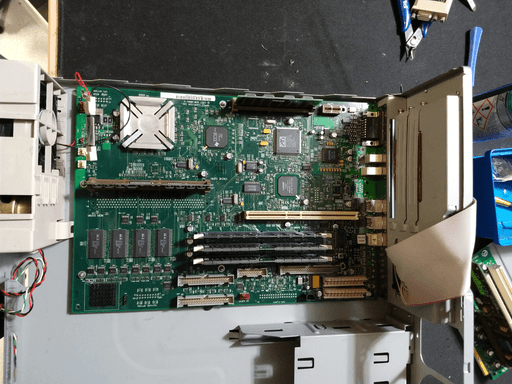
With the help of the service manual I then removed the motherboard. Before removing it I made note of which connectors plug where. It was only visibly held in by a plastic clip on the front and the ports in in the I/O shield on the back. There was a bunch of pegs that, by the looks of it, where only there for alignment purposes but held onto the PCB for dear live. I ended up spraying some lithium grease on them which helped me tremendously to slide the mainboard off without breaking it.
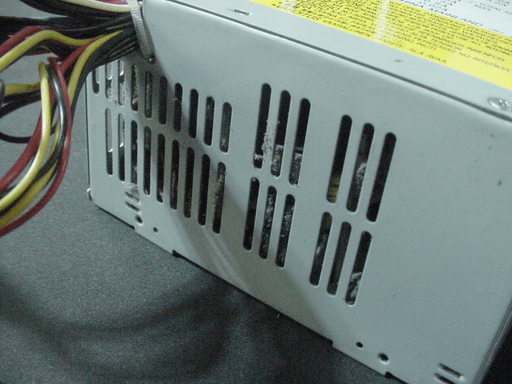
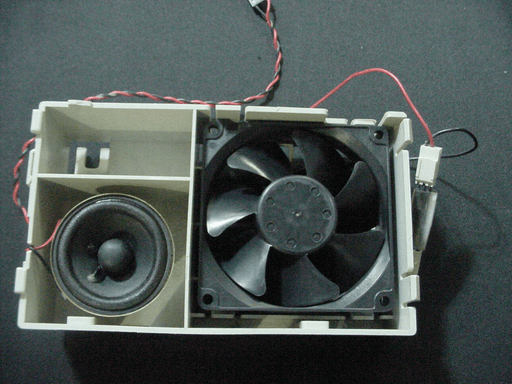
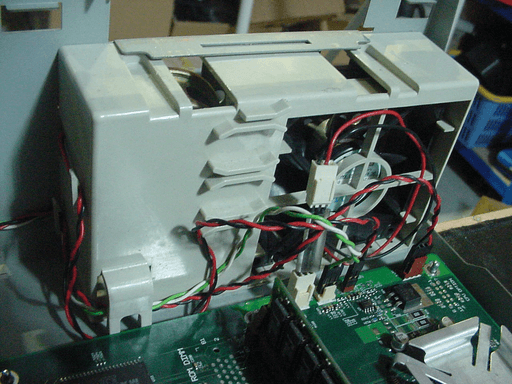
Last but not least where the AT-Style power supply and the assembly that holds the internal speaker and a fan in the front. The Power Supply was the dustiest of all components by a wide margin.


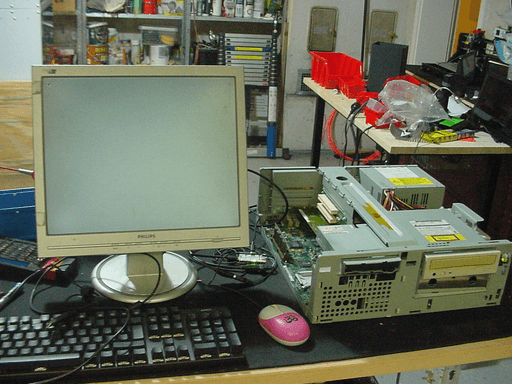
Now with everything laid out on my desk, I could finally start to work on it properly. I wish I took a photo of the empty case but I didn't. Or at least I can't find it anymore.
Chapter 2: drop dump it like it's hot
The next thing I wanted to do was to image the hard drive. Depending on the sellers due diligence it either had a working install of the system software with a bunch of files or nothing at all on it. Having a working installation to test the machine is always great. Maybe I'd even get some free software to play around with.
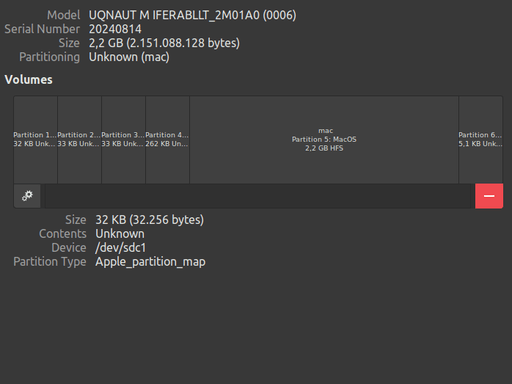
So I plugged into a portable USB-IDE Adapter and connected it to my laptop. Then I had to unmount the automatically mounted HFS partition because Linux be like that. After that I could use disk destroyer dump to make a backup of the whole drive. The whole way trough it sounded perfectly healthy so I had no concerns about putting it back into the computer,.
Chapter 3: It won't just kill you it will also hurt while you're dying
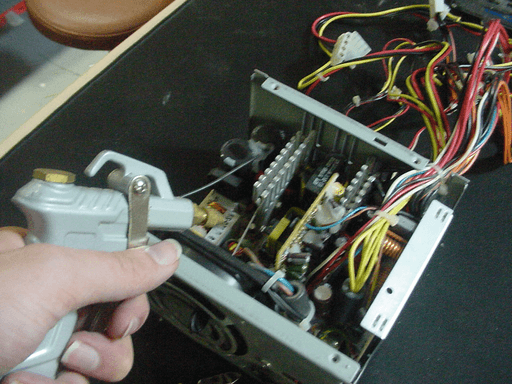
Next was the power supply. You're not meant to open them up and I don't like doing so. They contain a mix of mains voltage (which is 240V around here) and big capacitors that meat-bags like me don't really like. Since it wasn't plugged into the wall since I got it almost a year ago, I was less concerned about getting zapped, so I opened it up the free the internal fan an components from dust.
I'm aware that you shouldn't use a regular air hose on electronics because sometimes the air can be electromagnetically charged or just very moist. If I'll ever be working on a one-of-a-kind PC prototype I'll keep that in mind. For most of-the-shelve machines I don't care.
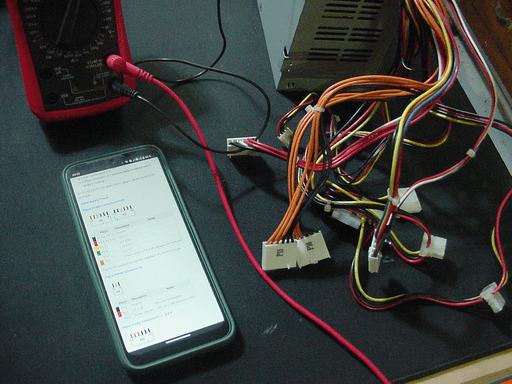
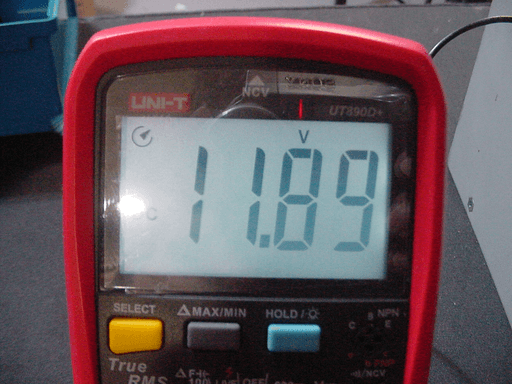
After cleaning it out I could hock up a multimeter, bridge the soft-power pins and plug it into the wall to check if all the voltages are plausible. Since there's no load on it I expected them to be a bit out of spec. It didn't blow up after turning it on and the Voltages where fine. I even set up a Camera to film in case I get some magic smoke.
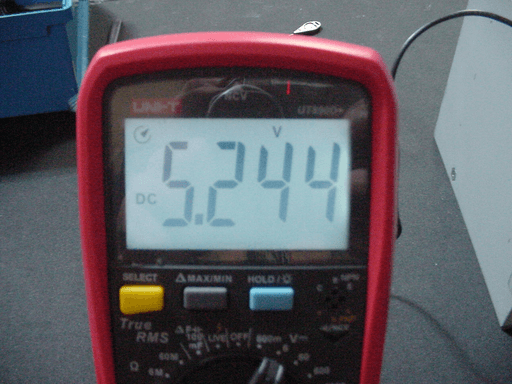
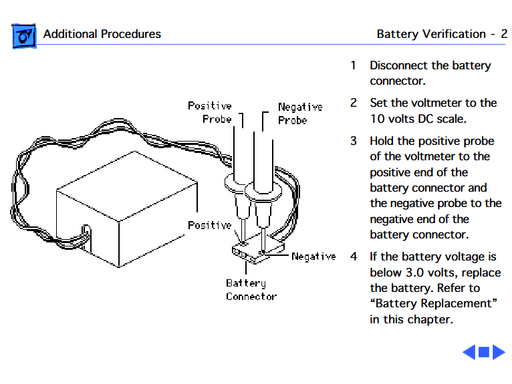
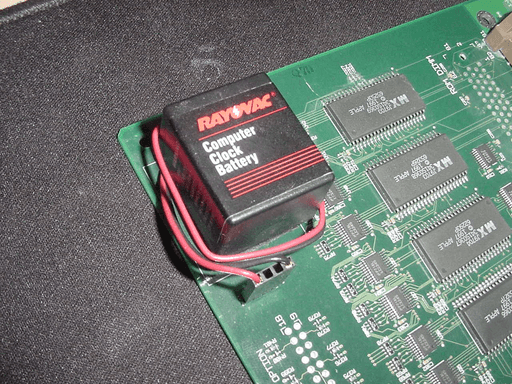
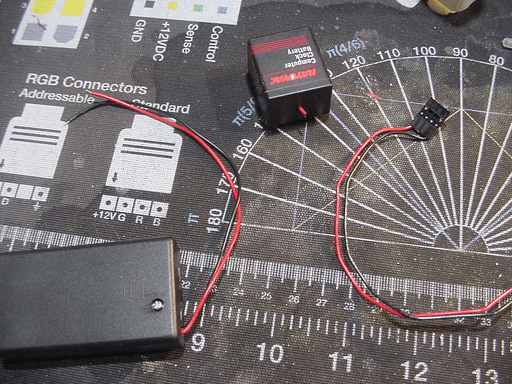
While at the topic of power, I also checked out the Clock Battery, a Rayovac 480. According to the service manual it should be replaced when it falls under 3 Volts. Mine was at -0.32 Volts, which is definitely a voltage. Because those batteries aren't made anymore and faithful clones are expensive, I decided to replace it with a triple-AAA battery holder which will output roughly the same voltage.

I didn't have any battery holders on hand, so I had to order some. For continuity's sake I'll act like I put one in right away. Because the wires on the battery holder where a bit short I cut the wires of from the battery and soldered them together. That way I also didn't have to crimp on a new connector.
Chapter 4: A clean computer is a happy computer
Now's time to give all other components the same compressed air treatment the power supply received. Before cleaning the motherboard I used a towel to wipe of the grease I put in the mounting holes. Then I went over it with a brush to loosen the dust and the air hose to blow it away. I did the same with the other two PCBs. After that I used compressed air on all other components (including the case) to clean them up. There aren't a lot of pictures of the cleaned parts, but you'lle see them as they're installed.
Chapter 5: Putting it all back together and preparing for lift-off
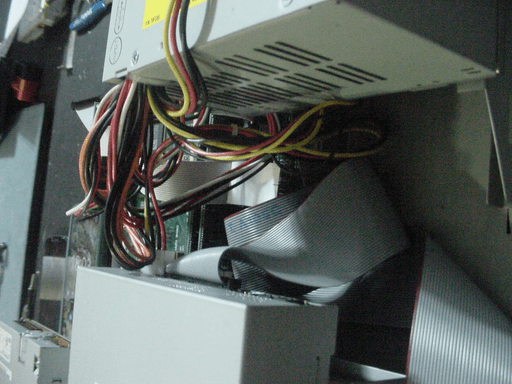
Putting the Macintosh back together was basically reverse of taking it apart. First comes the speaker-fan-assembly. It just clips in place with plastic hooks that are surprisingly tough for their age. After that the motherboard goes in. The locating-pegs gave me a bit of a challenge, but I managed to slot it in properly. The next thing I installed was the tested working PSU, plugging in all the power cables into the motherboard.
I also connected the three ribbon cables for IDE and the floppy drive at this point. I'm not sure about the build order here, because the connectors are more accessible at tis stage but the cables are in the way when putting in the drive assembly. But plugging them in later is also not fun because the connectors are partly covered by it.
What's not pictured is the new clock battery getting connected. Both that and the connectors for the power button, power LED, speaker and fan absolutely need to be connected before the drive assembly is inserted.

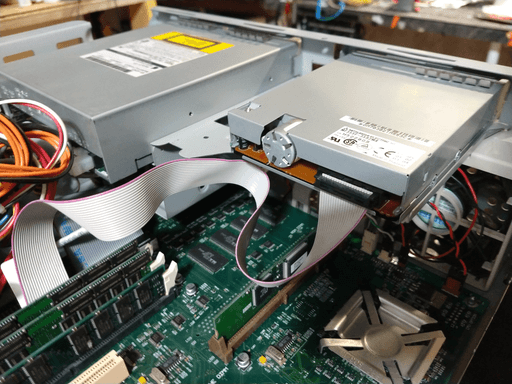
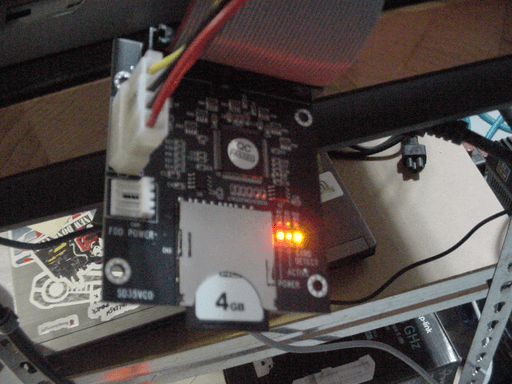
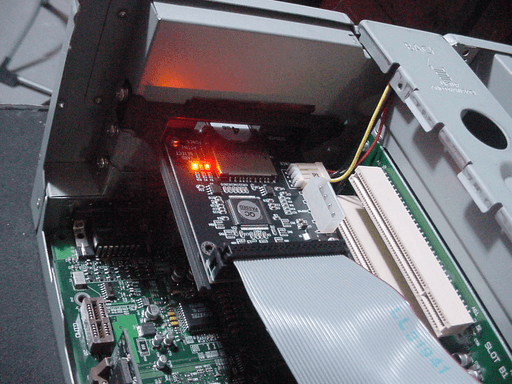
The next thing to install was the drive assembly, originally holding the floppy, CD and hard drive. That required some jiggling and stuff because of the aforementioned IDE cables. But once I got it in obstruction-free it could just slide into place. Initially I mounted back the original hard drive as well, but this one will be replaced later by an sd2ide mounted at the back. After installing the assembly I connected all the cables that need connecting to the drives.
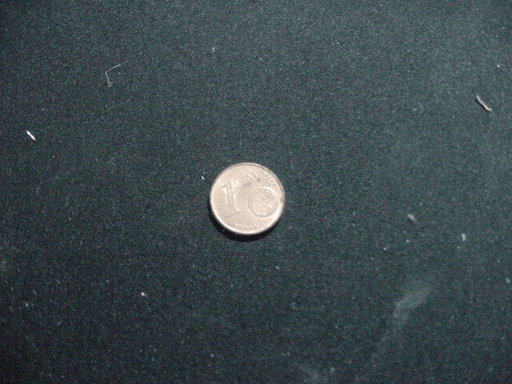
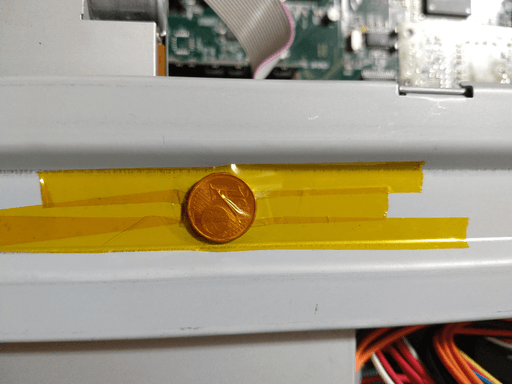
To finish up the assembly for now, I installed the network card together with its riser and put the cross-brace that actually holds everything together back in place. When I got the machine there was a one cent piece glued to to bottom of the case. I decided to keep it with the computer and used some tape to hold it on top of the brace.
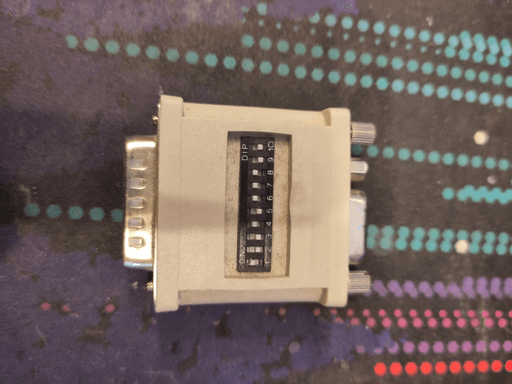
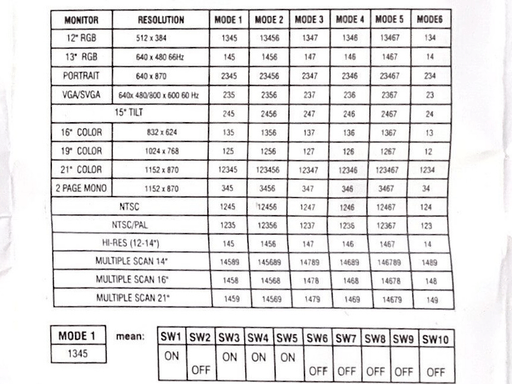
To connect it to a more modern VGA display I used an adapter that came in a box with a bunch of cables from the same auction. When looking trough all of them last year I wasn't sure what it was, but after reading up a bit on how to connect a mac with DB-15 video I quickly remembered that I already have an adapter somewhere. I didn't have a manual for it and it also didn't have a sticker with the DIP-switch positions but while reading this forum Thread I realized pretty quickly that there's only three types of those adapters: double-row with 16 switches, single-row with 10 switches and single-row with 6 switches. There's different brands but they're mostly just clones of each other. Based of the manual for my variant I set it to something that made sense to me. Thanks to Elemenoh for posting it. (The picture of the adapter was taken before I changed switches to the configuration I used)
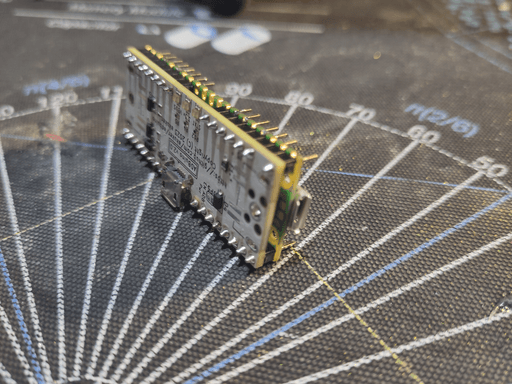
Now the PC was assembled and the display was connected. The only thing missing was a mouse and a keyboard, which I didn't have. My solution was an open-source project called ADBuino, which lets you connect modern USB hid-devices to computers using ADB. More on that later.
Chapter 6: T minus 5, 4, 3, 2, 1
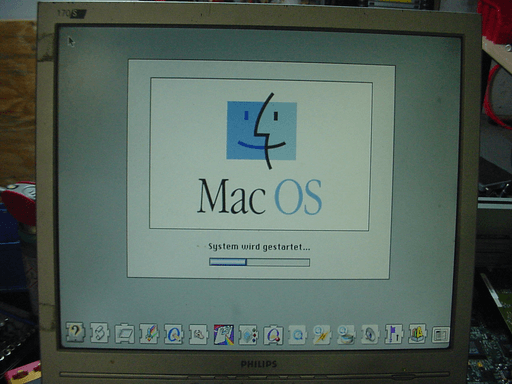
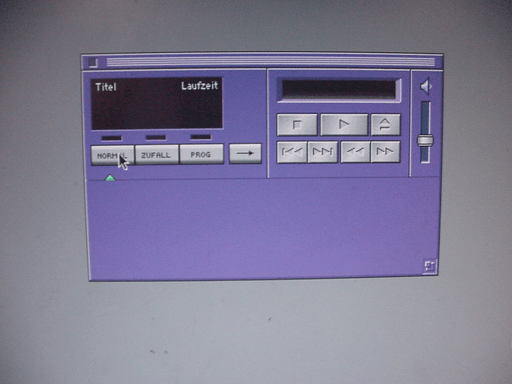
Now the computer was finally ready to be turned on. First I did so without the ADBunio just to see what happens. And it worked right away.
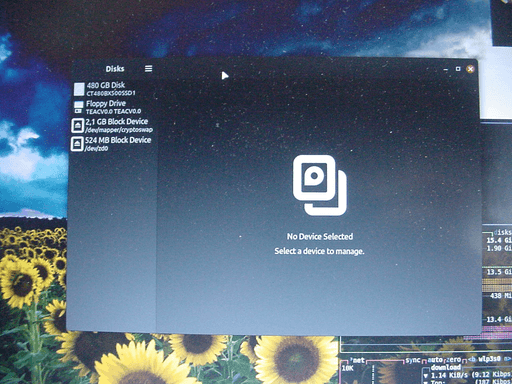
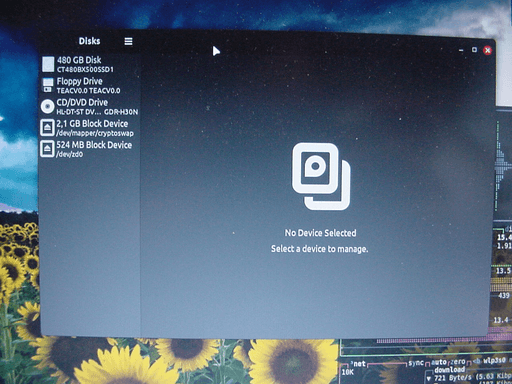
It booted up to the desktop but was awfully slow doing so. Partly because the previous user installed lots of stuff on it and partly because "it" is a mechanical hard drive. That was the point where I flashed the dump of the HDD I made previously onto an SD-Card and replaced the old drive with an sd2ide, letting it hang off the side for now.
Chapter 7: ADBuino
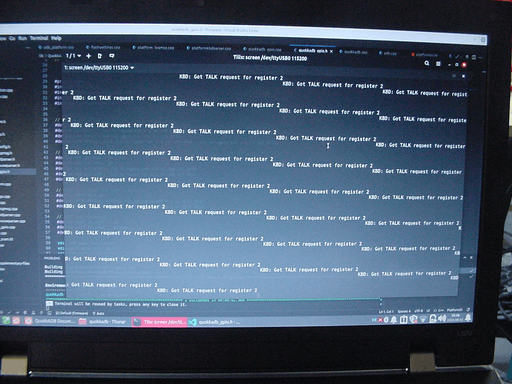
With everything working flawlessly so far it was time to connect the ADBunio. This is where the fun happened. I've already soldered it together beforehand and flashed to firmware on it as good as I could. The documentation of the project was very thin but after a bit of trial-and-error It spit out a binary that seemed to work.
Instead of chopping up a DIN-cable and soldering it to the thing, I decided to solder down a matching connector. After all was prepared, I used a DIN-cable to connect the ADBuino to the Computer, a USB power brick to connect to the secondary micro USB port and a USB-OTG adapter to connect a USB keyboard to the primary micro USB on the pico.
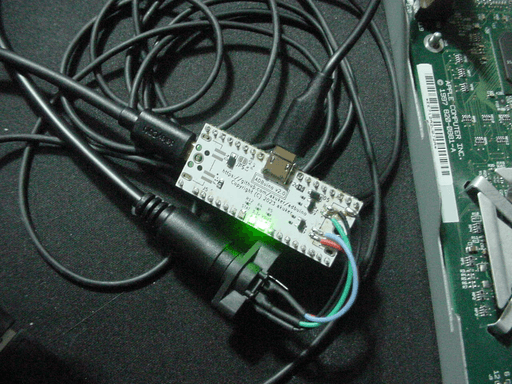
I pressed the power-button, and the display stayed gray with a cursor stuck in the top right. After trying some different combinations: ADBuino without USB-Devices, ADBuino without external power, just the cable to the ADBuino, no ADBuino; it became clear that there's something wrong with how I soldered the project together.
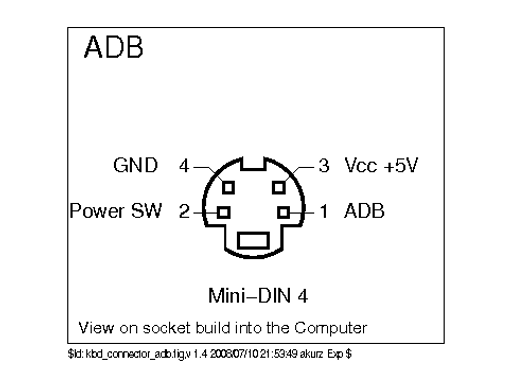
Some pinout reading and multimeter measuring later I figured out that I soldered the connector on the ADBuino on backwards. The pinout I was following was for the computer itself, and when using a straight-trough cable the pinout on the device woul've needed to be mirrored.
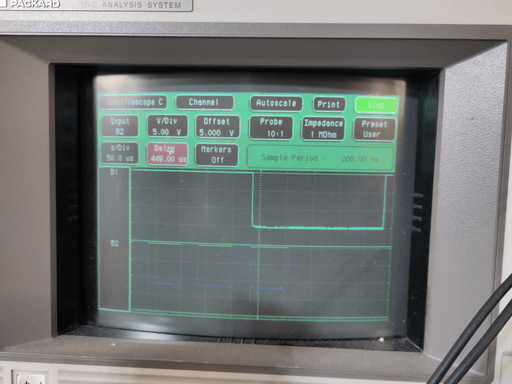
So I went ahead and fixed the issue. After that the mac would boot up but the ADBunio still wouldn't work. I spent some time looking at the debug-log of the thing and also used my HP 16500C to scope out what's going on. It looked like the signal, that requests data from a connected device, sent from the mac comes trough just fine (blue plot in the photo) but the answer from the ADBuino (greenish-blue) was either all HIGH or all LOW. It probably didn't help that the CRT on my scope is slowly dying. (That's a future blog post right there)
I decides to turn the ADBuino story into it's own blog post at that point. To be able to keep on working on this mac I went on ebay and bought a cheap ADB mouse and keyboard.
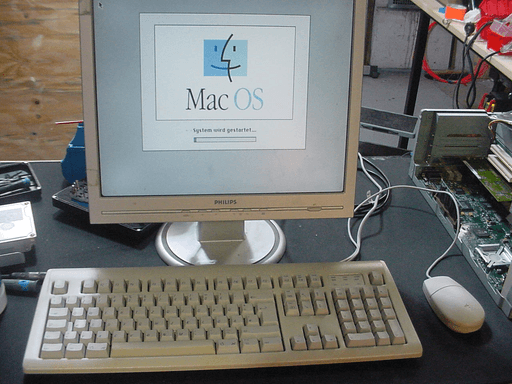
A week had passed since I messed around with the ADBuino when the new hardware came in. I also had mounted the battery holder where the HDD used to be. I plugged in the new mouse and keyboard, turned on the computer and everything worked right away. That's good news because I was worried that there's something wrong with the computer itself after plugging in a wrongly-wired ADB devices.
While I still had the computer open, I also mouted the sd2ide in the back so the SD card would be accessible from behind when the case is closed up.
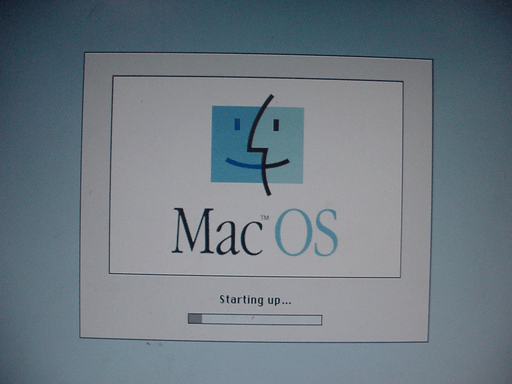
Chapter 8: (re-)Installing the OS
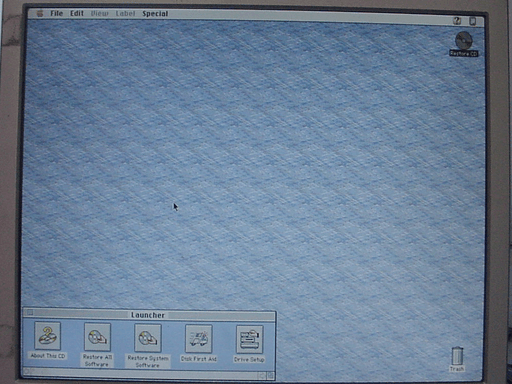
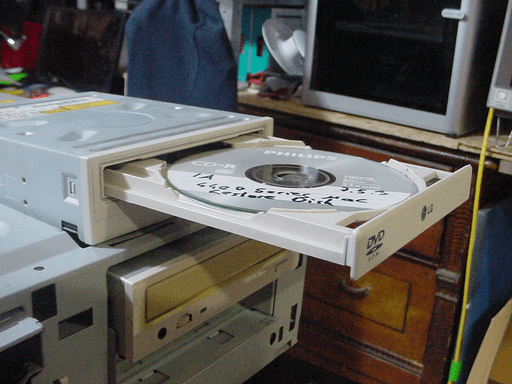
Since the computer was filled with personal data from the previous user I decided to install MacOS (without X) 7.5.3 on it. Thats the OS it was shipped with, so that made sense to me. To do that I downloaded a setup/recovery CD from Winworldpc, burnt it on a blank disk, put it into the machine and selected reboot. During boot I held the c button on the keyboard to boot directly from the CD.
And nothing happened. So I downloaded a different image from the Internet Archive, also burnt it to a disk, put it in and selected reboot. Held c again and nothing happened again. This is the point where I had to admit that I burnt 3 more CDs and tried holding down different keys before it occurred to me that the drive might be bad.
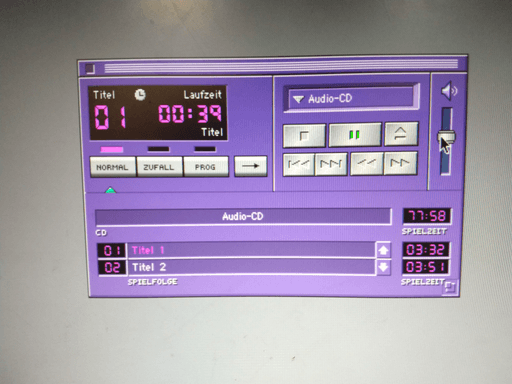
So I booted it up once again, plopped in an audio CD and started the CD player program. That quickly confirmed that there's something wrong with the drive. As luck would have it I had another IDE CD drive sitting on a shelf in my workshop, so I shut the mac down again and connected that one to it. As soon as I put an audio CD into that drive and hit play I could hear music coming from the front speaker of the machine.
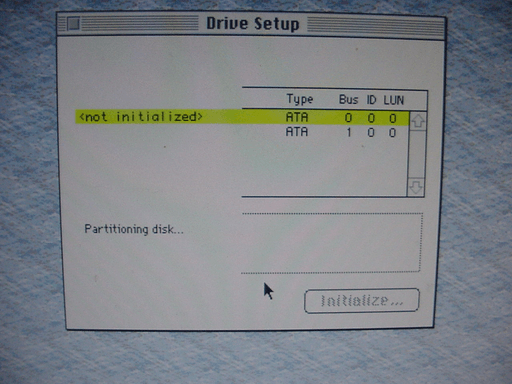
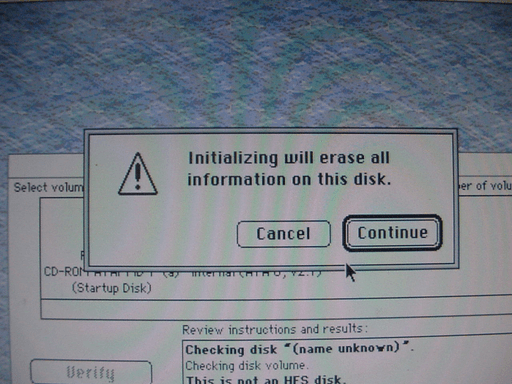
I made a mental note to fix the original drive and went ahead with installing MacOS from CD with the replacement drive. Putting the CD in, selecting restart and holding c now worked as expected. I went ahead and tried to re-initialize the drive but it seems like the mac didn't really like that all that much. I guess it didn't expect the drive to be an SD card. It froze completely and I had to shut it down by pressing the power button.
To make my life easier and to make sure there's no personal data from other people on the computer after I'm done I pulled out the SD card and formatted it on my Laptop. That way it's seen as a blank disk by the mac.
After a reboot I decided to use the disk first aid program to re-initialize the disk for a change, which seemed to do the trick. It seems very un-apple to have the same feature in two different locations. But maybe they're different and I just misunderstood what they do.
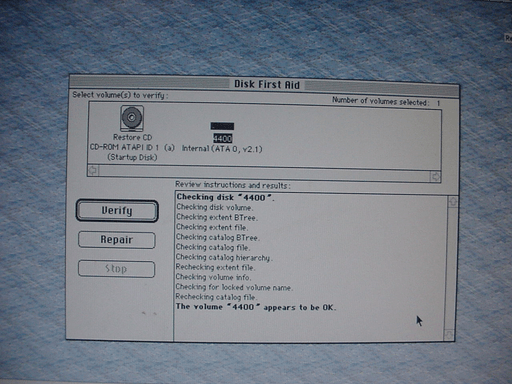
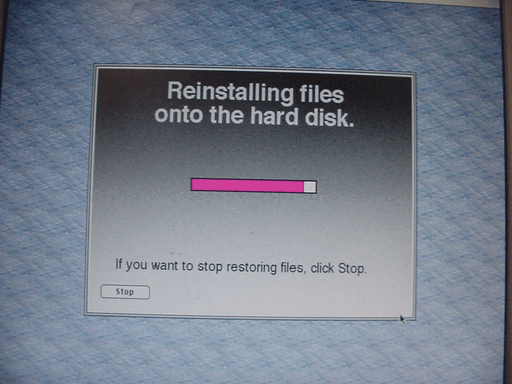
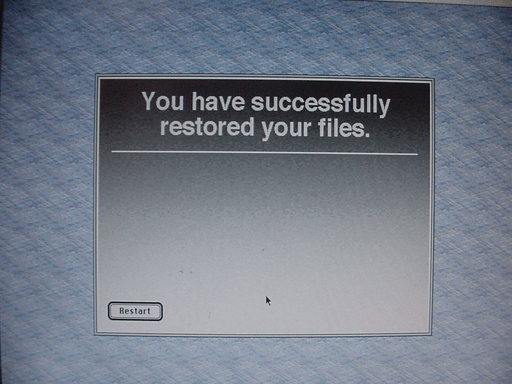
Now I could finally start the installation process itself. I went with the Restore System Software option because it sounded quicker than Restore All Software. After that I hit "restart" and took out the CD so it doesn't boot from it again. After that it went right back up with the new installation.
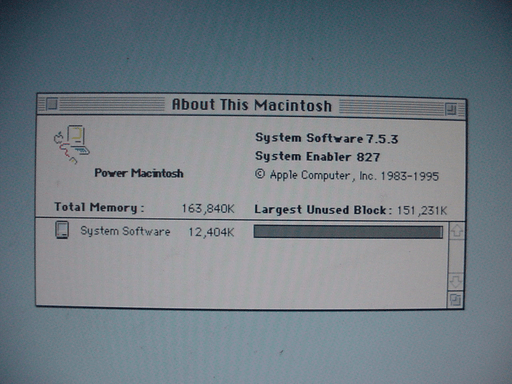
I checked if the version number is actually what it said on the CD and then wen ahead to mess around in the settings for a while.
Chapter 9 / Tangent: Visiting the Internet
Before I tackled the remaining things I had to do to finish the project I thought it was fun to connect the machine to the network and try to access the internet.
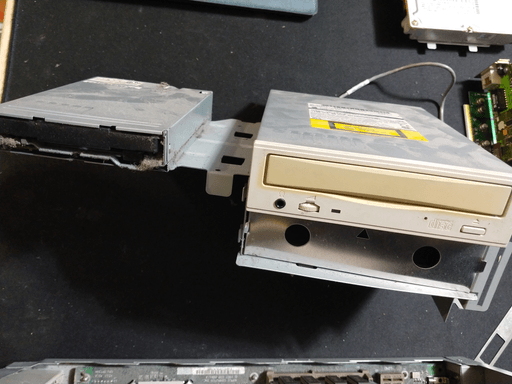
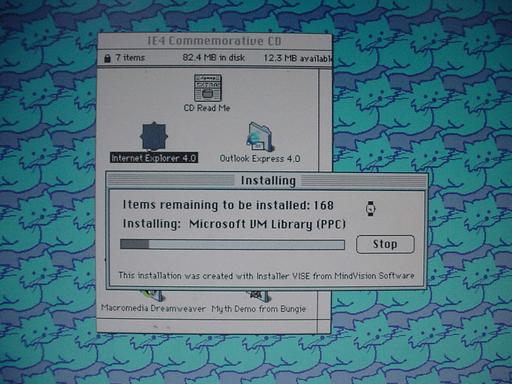
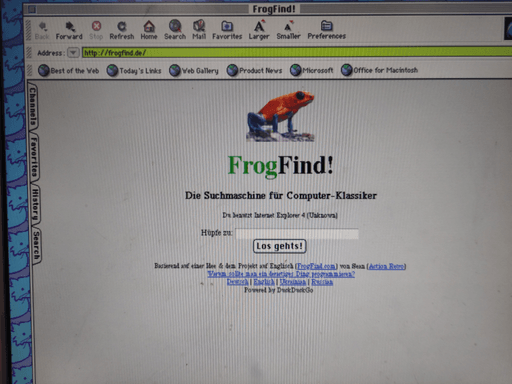
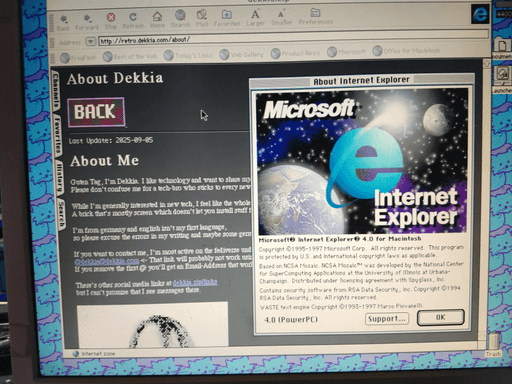
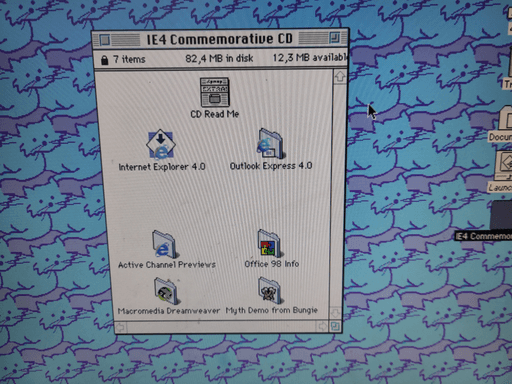
The first thing I tried to install was Netscape 2.02. This is how I found out that the floppy drive might be broken as well. To continue with my goal of going on the internet I burnt a CD for Internet Explorer 4.0 for Macintosh - Commorative Edition another great name for a thing.
That installation worked fine and I had to restart the computer after it was done. As expected most of the internet doesn't work on a browser the last century. That was actually what inspired me to make a version of this blog that work in old browsers. I posted a bit about it in a post called we have to go back. It's basically just the same content without CSS.

Chapter 10: About the CD Drive
Ok, here whe go. Between writing the previous part and now It's been two weeks. And a lot of stuff happened.
Initially I thought I could fix the drive, so I started to take it apart. Since it's from the "replace the whole assembly"-time of retro tech there wasn't a service manual available.
Quickly I learned three things:
- To get meaningful access to the PCB and mechanical parts, I needed to desolder the tray motor.
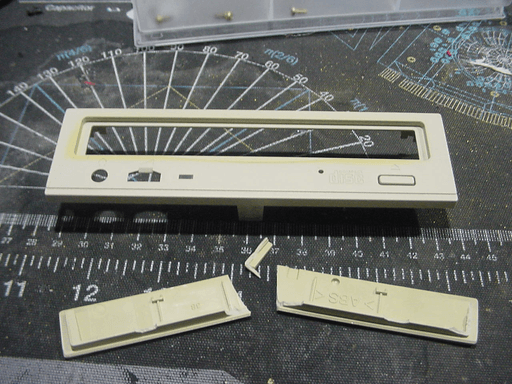
- The decoration plate on the front of the tray can slide up and away and has to be removed before the front bezel.
- Old plastic is brittle. I knew that, but a reminder is always welcome.
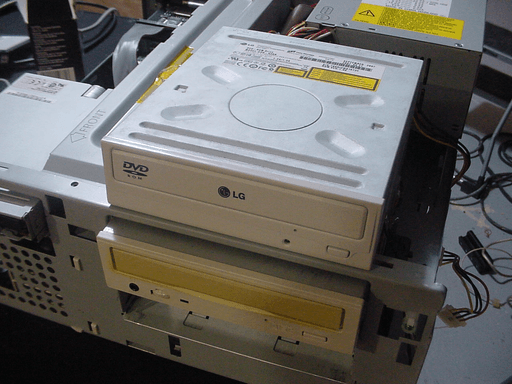
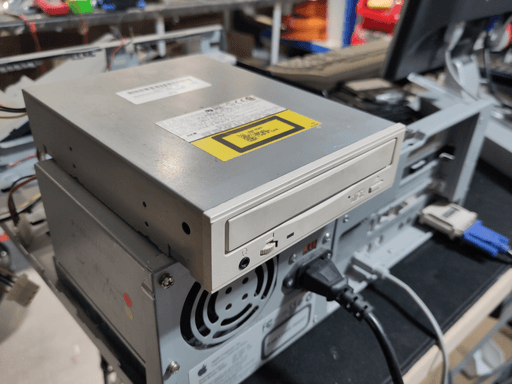
Because I already broke a part of the drive before even doing anything I figured it's worth to check eBay to see if I can get a replacement unit instead. And as luck would have it, there was one listing for a tested working HP-MATSUSHITA CR-583-B drive for 35?. So I decided to leave the broken drive alone and just replace it.
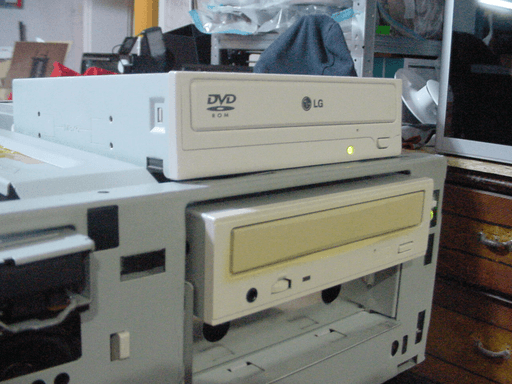
When the drive arrived a few days later, I was a bit surprised because I've gotten a gray one. For functionality it didn't matter, but a gray drive in a beige computer would look silly. So I also designed a 3D printable decoration plate for the tray that matched the dimensions of the original.
I could've glued to original back together, but considering that it was badly yellowed I would've needed to retrobright it, making it even more brittle. I tried a few different filaments to get the right tone of beige. In the photos you can see Bone White SUNLU PLA+. If I decided to not do retrobright, I would've went for Bone White eSUN PLA+, which perfectly matches the yellowed plastics. Knowing that those filaments look remarkably close to the real plastic will absolutely be helpful in the future.
Without testing the new drive I swapped front bezel and cover plate in the correct shade on and then plugged it into the Computer. And of course this drive also did not work. The way the error manifested itself was the same as with the old one. MacOS didn't complain about not having a drive, but it wouldn't talk to it either. I couldn't even eject the tray in software. When putting a disk in it by pressing the eject button on the front it would then just sit there. Like the other drive it didn't even attempt to spin up. Lovely.
I messaged the seller who sold the drive as tested and fully working, to ask if there's a testing protocol for the drive because it doesn't work. I also tested the drive on my ThinkPad using an USB adapter, which gave me nothing. But the LG drive I used temporarily on the Mac worked just fine, so I knew the adapter wasn't at fault.
Whatever was wrong with the drive caused it to not talk to the OS.
Because it was the weekend I would've needed to wait for the seller to get back to me. Which meant I had time to take the drive that came with the mac apart to maybe fix it. Maybe I could make one working drive out of two broken ones.
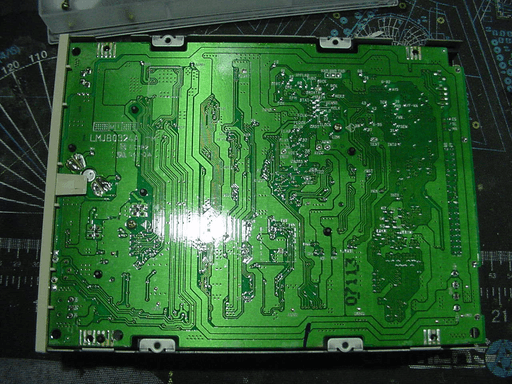
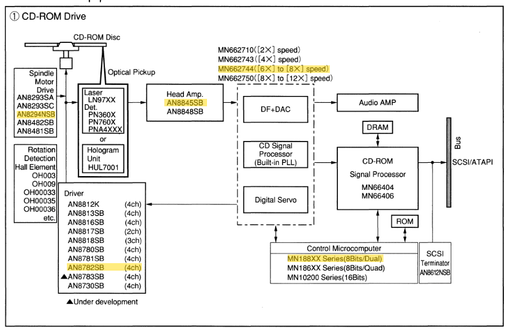
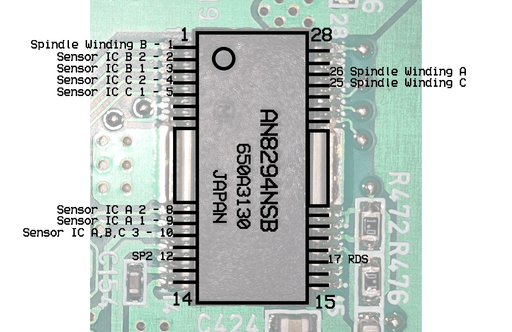
I want to spare you, dear reader, the details of what happened next. In short: I started partially reverse engineering the spindle driver motor in an attempt to find and fix what is causing it to not do its job. The only reference I could find about the Panasonic AN8294NSB chip online at all, is from the 1997 Panasonic Semiconductor Selection Guide. The guide showed a block diagram recommending Panasonic parts for a CD-ROM Drive. Multiple chips in that diagram could be found on the PCB from my drive.
If you're in the future and find this blog post by searching for the model number of that chip: I'm sorry, your princess is in another castle. If you have a drive with the same issue and manage to fix it, let me know.
Just as I was starting to look for datasheets of the sibling-chips mentioned in the block diagram, I got a notification from eBay that the seller responded to my message. After some quick follow-up questions by them and some troubleshooting recommendations they offered me to send me another drive. I immediately stopped with my reverse engineering efforts after I got that message.
I've got a bunch of photos from taking apart the drive to measure stuff with my multimeter, but since that storyline is basically I dead end I'll save those for a rainy day when I'm actually trying to fix the drive.
After the new new drive arrived, I plugged it in, turned on the computer and put a disk in.
And it just worked?.
Chapter 11: It's done(?)
Now seemed as a good a time as any to put it back together so I could work on some other stuff for a while. It's not done, but it's at a point where I won't feel bad for putting it on a shelf. So I screwed the disk drive to the bracket, and (as previously) fought to slide it in place. I connected the cross-brace, slid on the still very yellow front plate and closed it up with the metal outer case. The brace wouldn't stay down fully, but I figured the outer case will take care of that.

Now it was finally time to turn it on to see the fruit of my labor:
Cool.
This time I did something I normally don't do when something doesn't work: I searched online for it instead of trying to fix it blindly. Turns out the 4400 and other Macs as well probably doesn't turn on when the system battery is empty and the power has been unplugged for a bit. In that case one has to connect it to power and press the reset button which is buried on the motherboard where all the power supply cables plug in.
Now I have two computers that require a special dance to turn on when the internal battery is flat. Looking at you, 11th gen Framework Laptop. Luckily the power-switch on the battery holder was just in the off-position, once I turned it on and pressed reset, the power button worked again.
To match the previous video I put it all back together. I'm happy to present you this:
Chapter 12: In the next installment
The Computer is obviously not done yet. Here's a list of things I know need doing:
- Clean the floppy drive. It sometimes works and sometimes doesn't, that's probably just a dirty head
- Clean the case and remove sticker residue
- Retrobright the front plastic
- Get the ADBuino working
There will be a part two containing some of these things while others will get their own blog post some time in the future. For now I'm looking forward to working on other projects.
If you liked this post or found it helpful, let me know at @dekkia@dekkia.com in the fediverse. You can also follow me there or subscribe to the RRS-feed of this blog if you want to keep up to date with what I'm doing.
~ Dekkia